When it comes to printing Excel documents, it’s important that you get it right the first time. Not only is it frustrating to have to reprint multiple times, but it’s also a waste of paper and ink. That’s why we’ve put together this guide on how to print Excel documents without cutting off important information or having the document span multiple pages. Follow these steps and you’ll be able to print your Excel documents like a pro in no time.
Step 1: Adjust Your Margins
The first step in printing Excel documents is to adjust your margins. By default, Excel sets your top and bottom margins to .75 inches and your left and right margins to .7 inches. These settings are fine if you’re printing a standard document, but if you want to print a document that spans the entire page, you’ll need to adjust your margins accordingly.
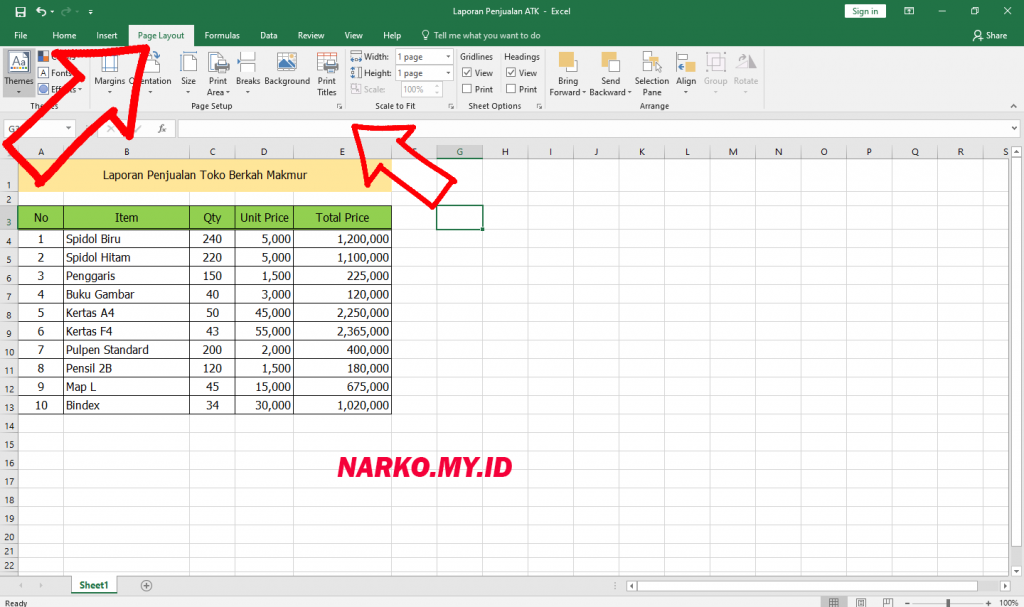
To adjust your margins, click on the “Page Layout” tab and then click on “Margins.” From here, you can choose “Custom Margins” and change your margins to fit your needs. We recommend setting your top, bottom, left, and right margins to .25 inches.
Step 2: Adjust Your Scaling
Once you’ve adjusted your margins, the next step is to adjust your scaling. Scaling allows you to make your document larger or smaller so that it fits on one page. If your document spans multiple pages, adjusting your scaling can help you get everything on one page.
To adjust your scaling, click on the “Page Layout” tab and then click on “Scaling.” From here, you can choose “Adjust to” and then set a percentage. We recommend setting your scaling to approximately 90% to fit everything on one page.
Step 3: Check Your Print Preview
Once you’ve made your adjustments, it’s important to check your print preview before you actually print your document. The print preview will show you exactly what your document will look like when it’s printed, so you can make any necessary adjustments before wasting paper and ink.
To access your print preview, click on the “File” tab and then click on “Print.” From here, you can see a preview of your document and make any additional adjustments. You can also choose which printer to use and how many copies to print.
FAQ
Q: How do I print a specific area of my Excel document?
A: To print a specific area of your Excel document, select that area and then click on the “File” tab and choose “Print.” From here, choose “Print Selection” under “Settings.” This will print only the selected area of your document.
Q: How do I print multiple Excel sheets at once?
A: To print multiple Excel sheets at once, hold down the “Ctrl” key and click on the sheets you want to print. Then, click on “File” and choose “Print.” From here, choose “Selected Sheets” under “Settings.” This will print all of the selected sheets at once.
Video Tutorial
For a visual step-by-step guide on how to print Excel documents without cutting off important information or having the document span multiple pages, check out the video below.


