Are you tired of struggling with CSV files and wish there was an easier way to work with them? Look no further than this helpful guide on how to convert CSV to Excel! With step-by-step instructions and helpful images, you’ll be able to master this process in no time.
Step 1: Open Excel and Create a New Workbook
Before you can start converting your CSV file, you need to have Excel open and ready to go. If you don’t already have Excel downloaded on your computer, you can easily find it online and purchase a subscription or download a free trial.
Once you have Excel open, click on the “File” tab in the top-left corner of the screen and select “New” to create a new workbook. You can also use the shortcut “Ctrl + N” to create a new workbook.
Step 2: Import Your CSV File
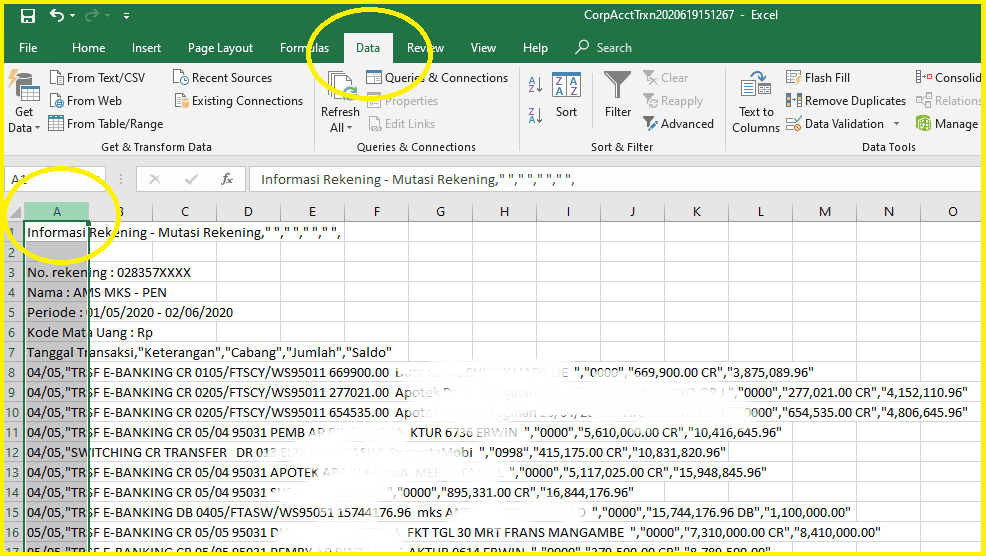
Now it’s time to import your CSV file into Excel. To do this, click on the “Data” tab in the top menu and select “From Text/CSV” in the “Get & Transform Data” section.
In the “Import Data” window, navigate to the folder where your CSV file is saved and select the file. Then, click “Import” to proceed.
Step 3: Specify Your Delimiter
When you import a CSV file into Excel, you’ll need to specify the delimiter used in the file. Delimiters are characters used to separate data in a CSV file, and different files may use different delimiters depending on the program or system used to create them.
In the “Text Import Wizard” window, select “Delimited” and click “Next”. Then, select the delimiter used in your CSV file. By default, Excel will use a comma (,) as the delimiter, but you can also select other options such as a tab or semicolon. If you’re not sure what delimiter to use, you can preview the data in the “Data Preview” section and see how the data is separated in the file.
Step 4: Choose Your Data Type
After specifying your delimiter, you’ll need to choose the data type for each column in your CSV file. Excel will automatically detect the data type for each column based on the data in the file, but you can also manually select the data type if needed.
In the “Text Import Wizard”, select “General” for columns that contain text or numbers, “Date” for columns that contain dates, or “Do not import column (skip)” for columns that you do not want to import.
Step 5: Review Your Data
After choosing your data types, you’ll be taken to the “Preview” screen where you can review how your data will look in Excel. If everything looks correct, click “Finish” to complete the import process. If you need to make any changes, you can go back and adjust your delimiter or data types before finishing the import.
FAQ
Q: Will importing a CSV file into Excel change the data in the file?
A: No, importing a CSV file into Excel will not change the data in the file. However, depending on the formatting of the CSV file, Excel may interpret the data differently when it is imported. For example, if a column in the CSV file contains numbers with leading zeros, Excel may remove the leading zeros when the data is imported.
Q: Can I export my Excel file back to a CSV file?
A: Yes, you can easily export your Excel file back to a CSV file by clicking on the “File” tab and selecting “Save As”. In the “Save As” window, select “CSV (Comma delimited)” as the file type and choose the location where you want to save the file. Excel will then save a copy of the file in CSV format.
Video Tutorial
For a visual demonstration of how to convert a CSV file to Excel, check out this helpful video tutorial:
So there you have it – a simple guide to converting CSV files to Excel. With these steps and tips, you’ll be able to work with your data more effectively and efficiently than ever before.


