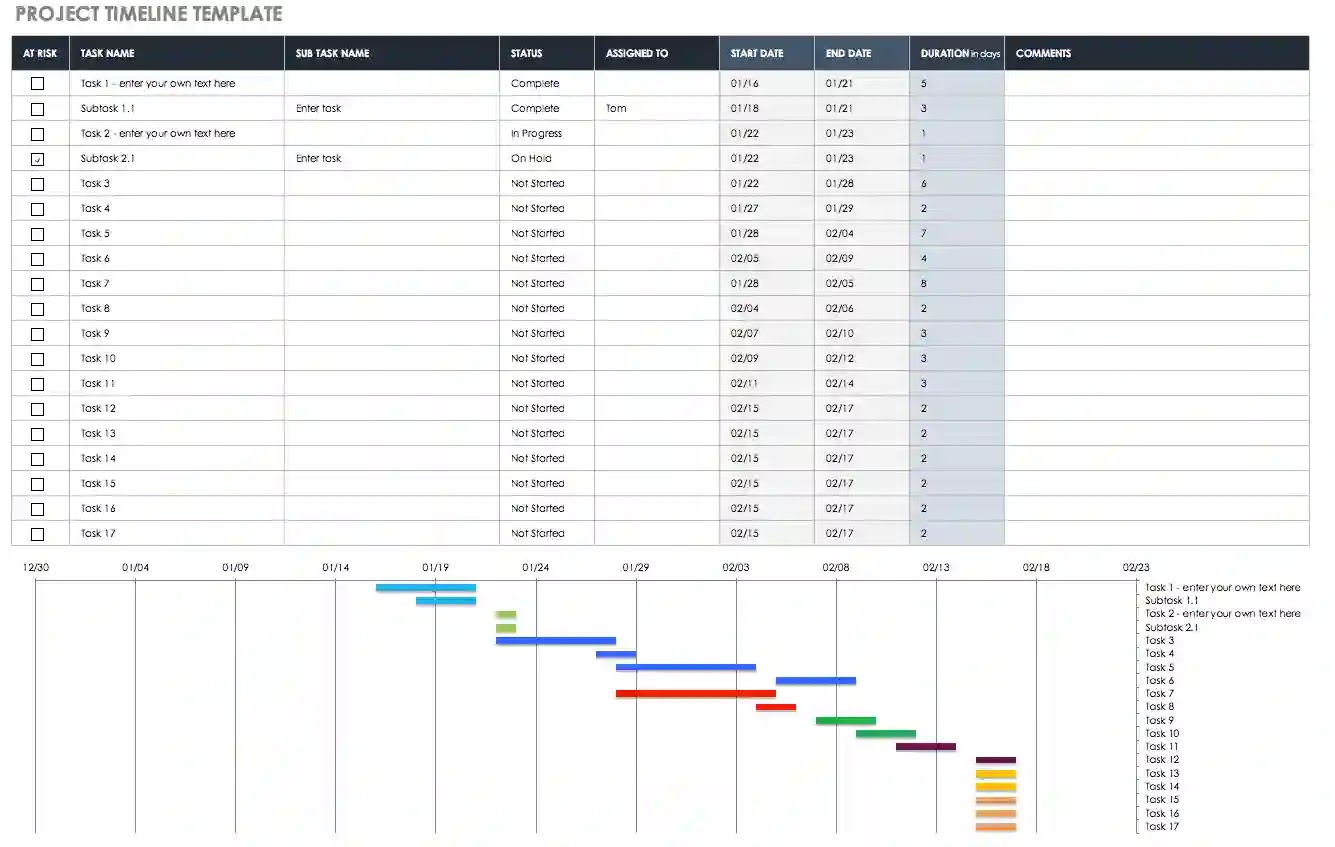
Scheduling is a crucial part of any project, especially when it comes to academics or business. There are multiple ways to make a schedule, both manually and digitally. In this article, we will discuss some easy steps to create a timeline in Excel, a popular digital tool used by many.
Step 1: Open a new Excel spreadsheet
Firstly, open a new Excel document on your computer. This can be done by opening the Microsoft Office suite and selecting Excel from there. After that, you can either start from scratch or use a pre-designed template to make your schedule. For example, you can find schedule templates for specific project types, such as construction, software development, or marketing, among others.
Step 2: Set up your columns
Your Excel file needs to have three main columns: Description, Start Date, and End Date. The “Description” column will contain a brief introduction to the task or activity listed. The “Start Date” and “End Date” columns will contain the dates when the task will start and end respectively. You can add other columns for additional information, such as status, priority, or owner.
Step 3: Input your data
Now that your columns are set, you can start filling out your schedule. Each task or activity should have a short description in the first column, the start and end dates in the second and third columns, respectively. Be sure to use the date format that matches your location or preference.
Step 4: Add finishing touches
You can now re-organize your data to show the schedule in a more visually-appealing way. For instance, you can select the entire table and click on “Format as Table” to add color and unique styles to it. You can also add conditional formatting, which allows the deadline or end date to change color based on how close it is. Finally, you can add a chart or graph to visualize your data with more clarity.
FAQ:
Q1. What is the importance of using a digital tool like Excel for scheduling?
A1. Excel has several advantages over manual scheduling. Firstly, it saves time and reduces errors. Secondly, it allows you to easily edit and update your schedule as needed. Thirdly, you can use built-in functions and formulas to calculate dates, hours, and other data points. Fourthly, you can share your schedule with team members or stakeholders online, allowing for a more efficient collaboration process.
Q2. How can I learn more about Excel and its features?
A2. Excel is a complex software with many features and capabilities. There are several resources available online for learning more about it. Firstly, you can use Microsoft’s own support portal, which contains video tutorials, articles, and forums. Secondly, you can look up Excel courses on websites like Coursera or Udemy, which offer online classes on various Excel topics. You can also join forums or online communities dedicated to Excel to ask questions and share tips and tricks with like-minded individuals. Lastly, you can watch tutorial videos on YouTube, where many Excel experts share their knowledge for free.
Video:
If you prefer visual learning, here is a short YouTube video on how to make a schedule using Excel:
Conclusion
Scheduling is important for any project or task, and digital tools like Excel can help us create and manage schedules more efficiently. By following the above steps, you can create your own timeline and customize it to your unique needs. Whether you’re a student, a business owner, or a project manager, Excel can make scheduling easier and more organized.
