Are you struggling with the installation of Windows 7? Don’t worry, we’ve got you covered! In this article, we’ll guide you through the process of installing Windows 7 on your computer using both a CD and a flash drive. We have also provided images for each step, so you can easily follow along. Let’s get started!
Installing Windows 7 from a CD
The first step in installing Windows 7 from a CD is to insert the CD into your computer’s CD/DVD drive. Once the CD is inserted, restart your computer. Your computer should then automatically recognize the Windows 7 installation CD and begin the installation process.
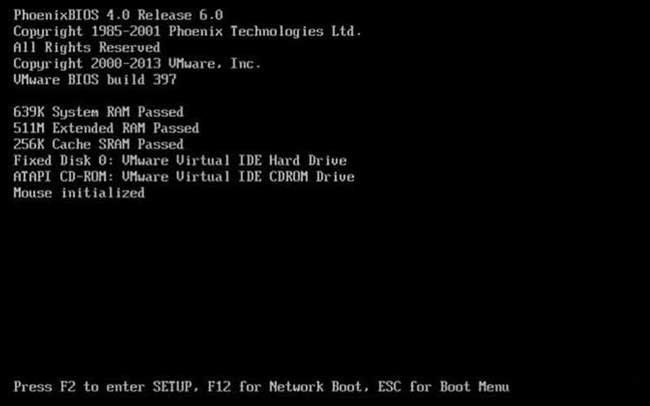
If your computer does not automatically recognize the CD, you may need to access your computer’s BIOS settings. This can often be done by pressing a specific key, such as F2 or Delete, during the boot-up process. Once you have entered the BIOS settings, look for an option to change the boot order and ensure that your CD/DVD drive is set to boot first.
Once the Windows 7 installation process has begun, you will be prompted to select your language, time zone, and keyboard settings. Follow the on-screen instructions to make your selections, and then click the “Next” button.
Next, you will be asked to select the type of installation you would like to perform. If you are performing a clean installation, select the “Custom (advanced)” option. If you are upgrading from an existing version of Windows, select the “Upgrade” option.
After selecting your installation type, you will be prompted to select the partition on which to install Windows 7. If your hard drive has multiple partitions, be sure to select the partition that you want to use for the Windows 7 installation. You may also need to format the partition before beginning the installation process.
Once you have selected your partition and any necessary formatting options, click the “Next” button to begin the installation process. Windows 7 will then begin copying files to your computer and installing the necessary components.
Depending on your system configuration and the speed of your computer, the installation process may take anywhere from 20 minutes to several hours. Be patient and do not interrupt the installation process, as doing so may cause errors or other issues.
Once the installation process is complete, your computer will automatically restart. You will then be prompted to enter your Windows 7 product key, which is typically located on the CD case or packaging. Follow the on-screen instructions to complete the activation process.
Congratulations! You have now successfully installed Windows 7 on your computer.
Installing Windows 7 from a Flash Drive
If your computer does not have a CD/DVD drive, or if you prefer to use a flash drive for the installation process, you can create a bootable Windows 7 flash drive using a free tool called Rufus. Before beginning the process, you will need a USB flash drive with at least 4GB of space and a copy of the Windows 7 installation ISO or file.
To create a bootable Windows 7 flash drive, follow these steps:
- Download and install Rufus from the official website.
- Insert your USB flash drive into your computer.
- Open Rufus and select your USB flash drive from the dropdown menu.
- Under “Create a bootable disk using,” select “ISO Image.”
- Click the “SELECT” button and select the Windows 7 installation ISO or file.
- Under “Partition scheme,” select “MBR.”
- Under “File system,” select “NTFS.”
- Click the “START” button and wait for Rufus to create the bootable flash drive.
Once Rufus has finished creating the bootable flash drive, you can use it to install Windows 7 on your computer. To do so, insert the flash drive into your computer’s USB port and restart your computer. Your computer should then automatically recognize the flash drive and begin the installation process.
The installation process for Windows 7 from a flash drive is similar to that from a CD. Follow the on-screen instructions to select your language, time zone, and keyboard settings, and then select the installation type and partition on which to install Windows 7. Once the installation process is complete, your computer will automatically restart and you will need to enter your Windows 7 product key to complete the activation process.
FAQ
1. Do I need to format my hard drive before installing Windows 7?
If you are performing a clean installation of Windows 7, you will need to format the partition on which you want to install Windows 7. This will erase all data on the partition, so be sure to backup any important files before beginning the installation process.
If you are upgrading from an existing version of Windows to Windows 7, you do not need to format your hard drive. However, it is recommended that you backup all important files before upgrading in case there are any issues during the installation process.
2. Do I need a product key to install Windows 7?
Yes, you will need a valid product key to install and activate Windows 7. The product key is typically located on the CD case or packaging, or it may be included with your computer’s documentation.
Video Tutorial
Want to see the installation process in action? Check out this video tutorial on how to install Windows 7:
Hopefully, this guide has helped you successfully install Windows 7 on your computer. If you encounter any issues or have any questions, be sure to consult your computer’s documentation or seek assistance from a professional. Happy computing!


