Installing and reinstalling Windows is a basic process that every computer user should know. In this article, we will provide a step-by-step guide on how to install Windows and also teach you how to reinstall Windows if something goes wrong.
Step 1: Backup Your Data
The first step before installing or reinstalling Windows is to backup all your data to avoid losing important files. Data backups can be done in several ways, such as saving files to an external hard drive or cloud storage services like Dropbox, Google Drive, or OneDrive.
Step 2: Create a Bootable USB drive
The next step is to create a bootable USB drive that you can use to install Windows. You will need a blank USB drive with at least 8 GB of space and a Windows ISO file. You can download the ISO file from the Microsoft website or from any trusted source.
Step 3: Boot from the USB drive
To start the installation process, you will need to boot from the USB drive. Insert the USB drive into your computer and restart it. Press the key displayed on the screen to enter the setup or boot menu. Depending on the computer manufacturer, it could be F2, F8, F10, F12, or Del.
Step 4: Install Windows
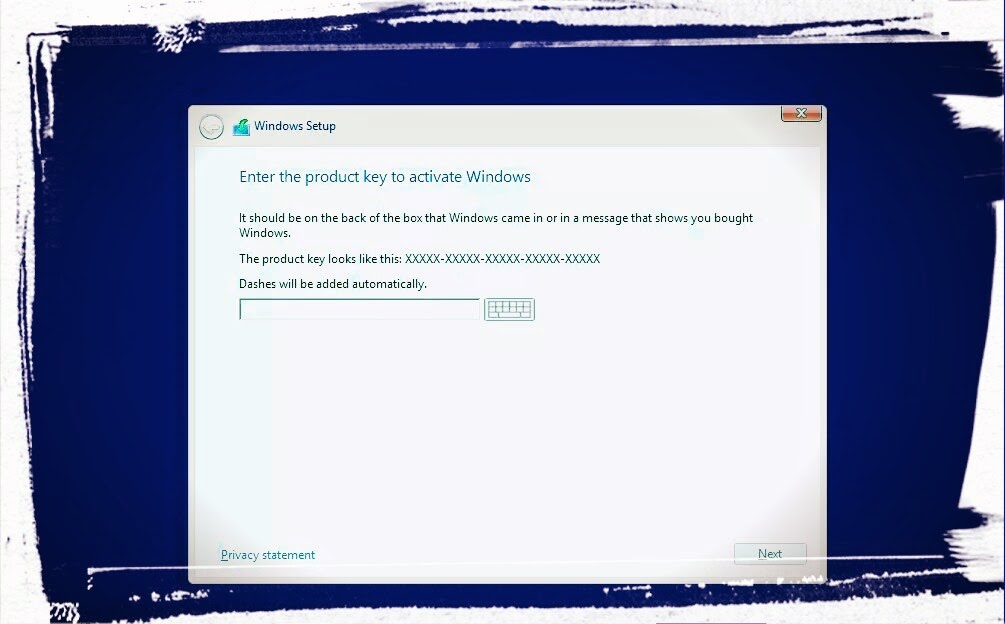
Once you have entered the boot menu, select the USB drive as the boot device. Windows installation will begin automatically. Follow the instructions displayed on the screen to complete the installation process. You may need to enter the product key during the installation process.
Step 5: Install Device Drivers and Other Software
After the installation is complete, it’s time to install the device drivers and other software required for your computer. Insert the software discs into the CD/DVD drive or download drivers and software from the manufacturer’s website.
Step 6: Restore Your Data
Now that Windows is up and running, it’s time to restore your data. Copy and paste your data from the backup location to the appropriate folders on your computer.
FAQs
Q1: Will I lose my data if I reinstall Windows?
A: Yes, unless you have backed up your data before reinstalling Windows, you will lose all your data. It’s important to backup data regularly to avoid losing important files.
Q2: Can I reinstall Windows without a product key?
A: Technically speaking, you can install Windows without a product key, but certain features of the operating system will be disabled, and you will be reminded to enter a valid key every few minutes. Moreover, the activation process should be completed within 30 days of installation, otherwise, the system will stop functioning.
Video Tutorial: How to Install Windows
Cara mudah Download & Instal PES 2019
If you are a gamer, you might want to install PES 2019 on your computer. Here’s a step-by-step guide on how to download and install PES 2019:
Step 1: Download the game from a trusted source
There are several websites where you can download PES 2019, but it’s important to download from a trusted source to avoid malware or viruses. We recommend downloading from the official website or from Steam.
Step 2: Install the game
Once the download is complete, open the setup file and follow the instructions displayed on the screen to install the game. You may need to enter the product key during the installation process. Once the installation is complete, run the game and enjoy!
FAQs
Q1: Can I run PES 2019 on my computer?
A: To run PES 2019 on your computer, you need to have a computer with at least Windows 7 operating system, 4 GB of RAM, and a graphics card that supports DirectX 9.0c.
Q2: Do I need an internet connection to play PES 2019?
A: You can play PES 2019 without an internet connection, but if you want to play online, you need to have an internet connection.
Video Tutorial: How to Download & Install PES 2019
Cara Instal Windows 8 Tanpa Produk Key atau Serial Number
If you don’t have a Windows product key or serial number and want to install Windows 8, here’s a step-by-step guide on how to do it:
Step 1: Download the Windows 8.1 ISO File
To install Windows 8.1 without a product key, you need to download the Windows 8.1 ISO file. You can download the ISO file from a trusted source or from Microsoft’s website.
Step 2: Create a Bootable USB Drive
You need to create a bootable USB drive to install Windows 8.1. You can use Rufus, a free tool to create a bootable USB drive.
Step 3: Boot from the USB Drive
Insert the USB drive into your computer and restart it. Press the key displayed on the screen to enter the setup or boot menu. Depending on the computer manufacturer, it could be F2, F8, F10, F12, or Del.
Step 4: Install Windows 8.1
Select the language and other preferences. Click Install Now and choose the Windows 8.1 version you want to install. Do not enter the product key and click Next. Accept the license terms and click Next. Select Custom Install and choose the partition where you want to install Windows 8.1. Click Next and wait for the installation to complete.
FAQs
Q1: Can I use the Windows 8.1 ISO file to install Windows 10?
A: No, you cannot use the Windows 8.1 ISO file to install Windows 10. You need to download the Windows 10 ISO file to install Windows 10.
Q2: Can I activate Windows 8.1 later if I don’t have a product key during installation?
A: Yes, you can activate Windows 8.1 later if you don’t have a product key during installation. You can use the Command Prompt to activate Windows 8.1. Type “slmgr /ato” and press Enter. Windows will be activated automatically.
Video Tutorial: Cara Instal Windows 8 Tanpa Produk Key atau Serial Number
Cara Instal Ulang Windows 7 dengan Flashdisk
If you need to reinstall Windows 7, here’s a step-by-step guide on how to do it using a flash drive:
Step 1: Backup Your Data
Before reinstalling Windows 7, backup all your data to avoid losing important files. Data backups can be done in several ways, such as saving files to an external hard drive or cloud storage services like Dropbox, Google Drive, or OneDrive.
Step 2: Prepare the USB Flash Drive
Insert a USB flash drive with at least 8 GB of space. Open Command Prompt and type “diskpart” and press Enter. Type “list disk” and press Enter. Choose the disk you want to use as the bootable USB and type “select disk X” (Replace X with the number of the disk). Type “clean” and press Enter. Type “create partition primary” and press Enter. Type “active” and press Enter. Type “format fs=fat32 quick” and press Enter. Type “assign” and press Enter. Type “exit” and press Enter.
Step 3: Make the USB Drive Bootable
Insert the Windows 7 installation disc into the CD/DVD drive. Open Command Prompt and go to the boot directory of the installation disc. Type “bootsect /nt60 X:” (Replace X with the drive letter of the USB flash drive) and press Enter. Copy all the files from the installation disc to the USB flash drive.
Step 4: Boot from the USB Drive
Insert the bootable USB flash drive into the computer and restart. Press the key to enter the setup or boot menu. Depending on the computer manufacturer, it could be F2, F8, F10, F12, or Del. Choose the USB flash drive as the boot device.
Step 5: Install Windows 7
Once you have entered the boot menu, select the USB drive as the boot device. Windows installation will begin automatically. Follow the instructions displayed on the screen to complete the installation process. You may need to enter the product key during the installation process.
FAQs
Q1: Can I reinstall Windows 7 without a CD or DVD?
A: Yes, you can use a bootable USB flash drive to install Windows 7 instead of a CD or DVD.
Q2: What is the minimum hardware requirement for Windows 7?
A: The minimum hardware requirement for Windows 7 is a 1 GHz or faster processor, 1 GB of RAM, 16 GB of free hard disk space, and a DirectX 9 graphics device with WDDM 1.0 or higher driver.


