Excel is undoubtedly one of the most significant spreadsheet applications worldwide, widely used for various purposes, including data analysis, calculation, and record-keeping. However, some Excel users may encounter issues while accessing, printing, or editing Excel files. In this article, we will discuss some common Excel-related problems and their solutions to enhance your experience with the application.
 Excel File Access Issues
Sometimes, when you try to access an Excel file, it shows a message stating that the file is read-only, which means you cannot edit or modify the file. It is a common issue faced by many Excel users. However, you can solve the issue by following the below-mentioned steps:
Step 1: Check for File Attributes
The first thing you need to check is the file attributes. Ensure that the file attributes are not set to read-only. You can follow the below-mentioned steps to check the file attributes:
- Locate the Excel file on your PC
- Right-click on the file and select ‘Properties’
- Check if the ‘Read-only’ option is checked. If yes, uncheck it and click ‘Apply’
Step 2: Disable Protected View
If you are opening an Excel file downloaded from the internet, it might open in the protected view, restricting you from editing the file. You can follow the below steps to disable the protected view:
- Open Excel Application
- Click on ‘File’ > ‘Options’
- Select ‘Trust Center’ from the left-hand panel
- Click on ‘Trust Center Settings’
- Select ‘Protected View’ from the left-hand panel
- Uncheck all the checkboxes under protected view
- Click ‘OK’
 Excel Printing Issues
Another common issue faced by Excel users is that the excel file might not get printed correctly, and parts of the document are cut off. You can try the below-mentioned methods to overcome the Excel printing issues:
Method 1: Use the Print Preview
You can use the print preview feature in Excel to check how the document will look after printing. Follow the below-mentioned steps:
- Open the Excel file
- Click on ‘File’ > ‘Print’
- Click on ‘Print Preview’
- Check if all the data appears in the print preview mode
- If necessary, adjust the page margins and scaling of the document
- Click on ‘Print’
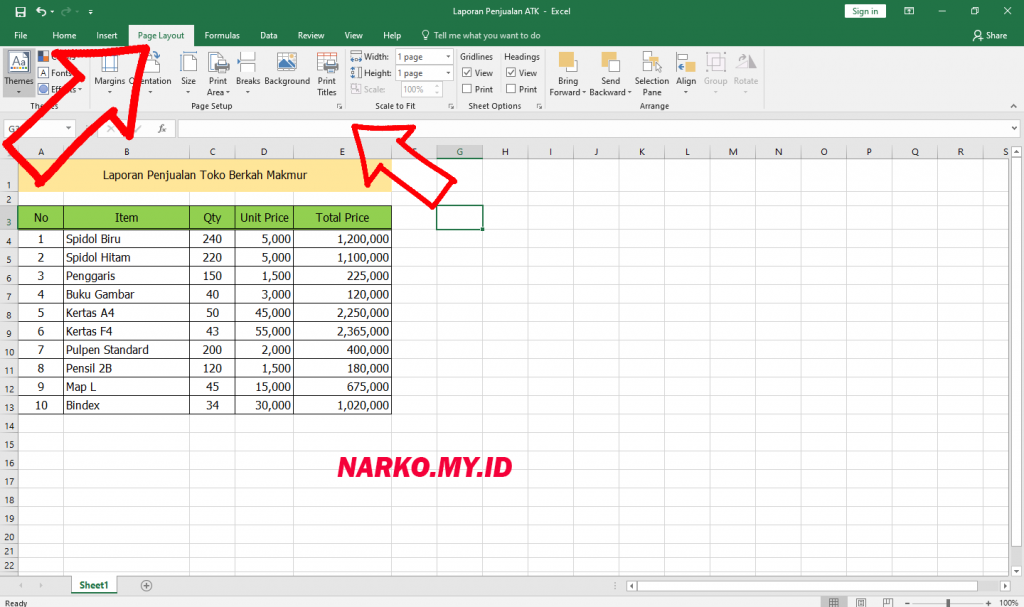
Method 2: Adjust Page Settings
If you are still facing printing issues, try adjusting the page settings manually. Follow the below-mentioned steps:
- Open the Excel file
- Click on ‘Page Layout’
- Select ‘Page Setup’
- Click on ‘Scaling’
- Adjust the scaling percentage to fit the document to a single page or split into multiple pages
- Click ‘OK’
- Click on ‘File’ > ‘Print’
- Print the document
 Excel Page Breaks Issues
Excel document page breaks are made to help break up a large amount of information into smaller, manageable parts. However, sometimes, Excel can make page breaks in awkward places, cutting off the desired content. The following method will help you fix the Excel page break issue:
Method 1: Adjust Page Breaks Manually
You can use the following steps to adjust page breaks in Excel manually:
- Select the cell indicating the beginning of the desired page when printed
- Go to the ‘Page Layout’ tab
- Click on ‘Breaks’
- Select ‘Insert Page Break’
- The page break will be inserted below the highlighted cell
FAQ
1. How can I freeze panes in Excel?
You can freeze panes in an Excel document to lock some rows or columns in place, allowing them to be viewed even while scrolling through a large amount of data. Follow the below-mentioned steps to freeze panes:
- Select the row below the last row you want to freeze or the column to the right of the last column you want to freeze
- Go to the ‘View’ tab
- Click on ‘Freeze Panes’
- Select ‘Freeze Panes’
2. How can I insert a hyperlink in Excel?
You can insert a hyperlink in excel to link a cell to another file or web page. You can follow the below-mentioned steps to insert a hyperlink:
- Select the cell which will act as the hyperlink
- Right-click the cell and select ‘Hyperlink’
- Enter the URL of the web page or navigate the desired file location
- Click ‘OK’
Include Video Tutorial for Excel Printing Issues
Wrapping Up:
We hope this article helps you to improve your Excel experience and overcome some common Excel issues successfully. Do try the above-mentioned methods to fix these issues and let us know in the comments if they work for you. Happy Excel-ing!
 Excel File Access Issues
 Excel Printing Issues