Are you wondering how to print Excel documents in the best way possible? Excel documents are essential for businesses and individuals alike, and there are certain tips and tricks that can make your printing experience much smoother and efficient. In this article, we will share with you some of the best practices when it comes to printing Excel documents.
Print Excel Documents in the Middle of the Page
Printing Excel documents can be quite challenging because sometimes the printout is not aligned correctly. The result is either the page cutoff or the content appearing at the edge of the page. If you want to avoid this issue, you can try using the ‘Print in the Middle of the Page’ feature. This feature allows you to print the content in the center of the page, making it easier for you to read and get a more professional-looking printout.
To print your Excel document in the middle of the page, follow these steps:
- Open the Excel document you want to print
- Click on ‘File’ and then select ‘Print’
- In the Print dialog box, select the ‘Page Setup’ option
- Click on the ‘Margins’ tab and enter your preferred settings for the Left, Right, Top, and Bottom margins
- Under the ‘Center on page’ options, click on the ‘Horizontally’ and ‘Vertically’ checkboxes
- Click on the ‘Print’ button to print your document
Print Multiple Pages on One Sheet of Paper
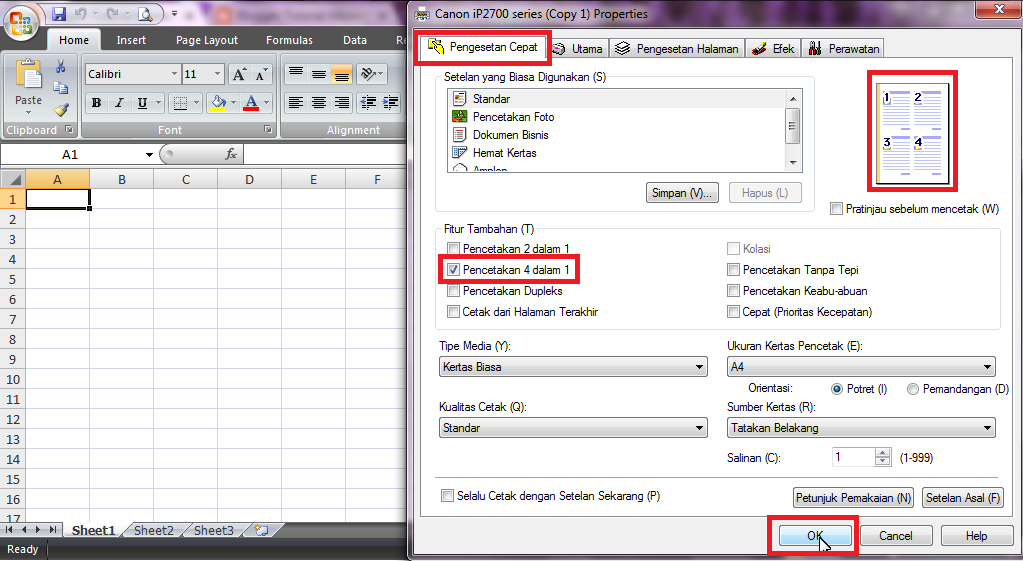
Another challenge that many Excel users face is printing multiple pages in one sheet of paper. This is a great way to save paper and is especially useful when you need to distribute large documents. If you want to print multiple pages on one sheet of paper, follow these steps:
- Open the Excel document you want to print
- Click on ‘File’ and then select ‘Print’
- In the Print dialog box, click on the ‘Page Setup’ option
- Click on ‘Scaling’ and then select the ‘Fit All Columns on One Page’ option
- Under the ‘Page’ option, select ‘2 Pages Per Sheet’
- Click on the ‘Print’ button to print your document
FAQs:
Q1: What Should I Do When My Excel Document Appears Cropped When Printed?
A: If your Excel document appears cropped when printed, there are a few things you can do. The first is to try adjusting your margins. You can try reducing your margins, or if your content falls outside the print area, try increasing your margins. Another option is to adjust your scaling. You can try printing your document with a smaller scaling percentage, or select the ‘Fit All Columns on One Page’ option. This should help reduce the chances of your content getting cropped when printed.
Q2: How Can I Make My Excel Printouts More Professional?
A: If you want to make your Excel printouts more professional, there are several tips you can follow. First, make sure your content is aligned evenly and is easily readable. Use bold or italicized fonts to highlight important information. Add header and footer information to your document, such as the date or page number. Make sure to proofread your document and fix any errors. You can also add graphics or charts to make your document more visually appealing.
Watch this Video for more Excel Printing Tips and Tricks!
In conclusion, printing Excel documents can be a smooth and efficient process if you know the right tips and tricks. By using features such as ‘Print in the Middle of the Page’ and ‘Printing Multiple Pages on One Sheet of Paper,’ you can achieve a more professional-looking printout. Remember to proofread your document, add headers and footers, and adjust margins and scaling as needed to make your printouts more polished. With these tips, you can easily print Excel documents with confidence and ease!
.jpg)
