Have you ever encountered problems while working on Microsoft Excel? May it be about printing the document, the margin, or even just the text format? Worry no more, as we will guide you on how to overcome these hurdles with ease and confidence. By the end of this article, you will be able to understand how to adjust the margin in Excel, print Excel without it being cut off, and prevent text elongation in your document.
Adjusting Margin in Excel
When working on an Excel document, it is important to adjust the margins to avoid cut-offs while printing. Here’s how to do it:
- Open the Page Setup dialog box.
- Go to the Margins tab.
- Save your changes
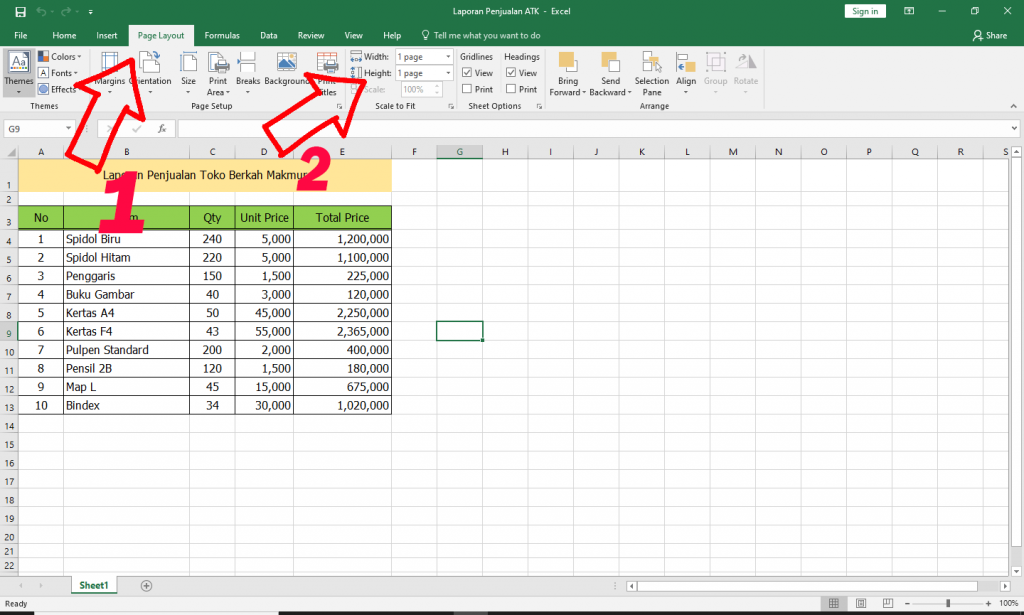
To open this dialog box, go to the Page Layout tab and click on the small arrow button on the bottom right corner of the Page Setup section.
Once the Page Setup dialog box appears, click on the Margins tab. Here, you can adjust the margins according to your preference; top, bottom, left, and right margins can be edited either by manually adding the numerical value or by dragging the margin’s icon on the ruler.
After adjusting the margins, make sure to save your changes by clicking “OK.”
There you have it! Properly adjusting the margins ensures that your work is neat and presentable. This is especially important if you need to present your document to colleagues or superiors.
Printing Excel without Cut-offs
Printouts are essential for hard copies of Excel documents. However, there might be instances where certain areas of the document get cut off on paper. Here’s how to fix it:
- Adjust the margins
- Preview your document
- Set your print area
- Adjust the scale of your printout
As a first step, refer to the steps above on how to adjust margin. When adjusting the margin, make sure to leave a small part of the margin as blank to ensure that the text will fit in the page.
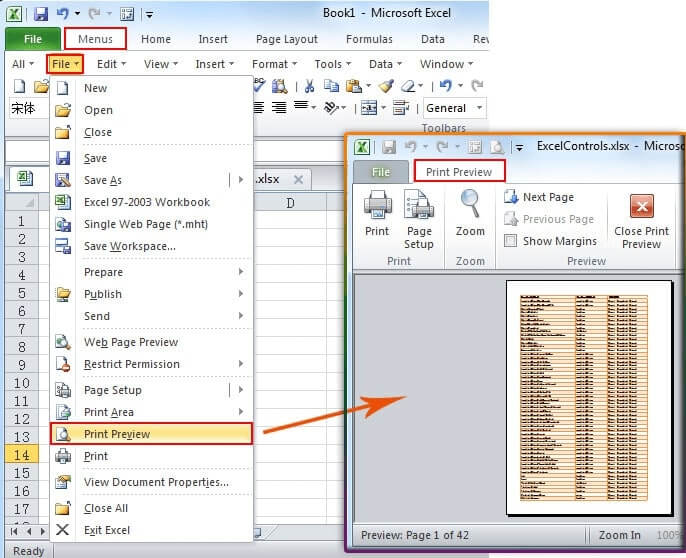
Before printing, preview your document first to see how it would be presented on paper. To do this, go to File > Print and click on the Preview button on the right. Zoom in or out as needed to ensure that all texts and columns are showing up correctly.
Select the range of cells that you want to print. To do this, highlight the desired cells and go to the Page Layout tab and select “Print Area” followed by “Set Print Area.”
If your document is still cut off even after adjusting the margins and print area, you can try changing the scale of your printout. To do this, go to the Page Layout tab and select “Scale to Fit Width” or “Scale to Fit Height.”
Following these steps will save you from printouts with cut-offs and ensure that your document is easy to read and comprehend.
Preventing Text Elongation in Excel
It can be frustrating when text elongates and goes beyond the cell or the page. Here’s how to prevent it:
- Expand the cell
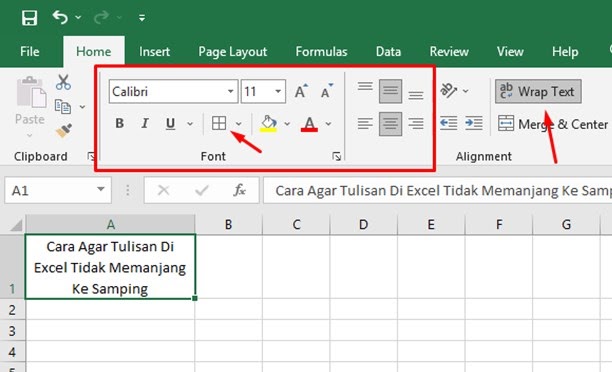
- Wrap the text
If the text is elongating beyond the cell, you can expand it by double-clicking on the line between two columns. This will adjust the size of the column to fit the text.
Another way to prevent text elongation is to wrap it. To do this, select the cell or range of cells that you want to format, right-click and select “Format Cells.” Go to the Alignment tab and select “Wrap text.”
Voila! The text will now be wrapped and will fit into the cell or the page.
Frequently Asked Questions (FAQ)
How else can I adjust margins in Excel?
Another way to adjust margins in Excel is to use the ruler. To do this, go to the Page Layout tab and select “View Ruler”. From here, click on the margin icon on the ruler and drag it to where you want the margin to be.
What should I do if I can’t see the margins when adjusting them?
If you can’t see the margins when adjusting them, go to the Page Layout tab and select “Page Setup”. From here, under “Page,” select “Fit to” and “1 page wide by 1 page tall.” You can then adjust your margins accordingly.
Video Tutorial
For a more in-depth tutorial on how to adjust margins, prevent text elongation, and print without cut-offs, check out this video:
Now that you’ve reached the end of this article, we hope that you learned something new and useful. By following these easy steps, you can properly adjust your margins, print documents without cut-offs, and prevent text elongation in your Excel document. Happy formatting!


